Review of Intensify CK from Macphun
I’ll get the basic information out of the way first before getting into my comments and review. First, this is a Mac OS only application. Sorry my Windows followers, but if you are looking for something that does run on Windows, I would check out On1’s Photo 10.5
The Intensify CK System and Software requirements
- Mac OS 10.9 and above
- iMac/MacBook Pro/ MacBook Air/Mac Pro/Mac Mini late 2009 or later
- 4GB RAM and more
- 512 MB Graphic RAM and more
- Creative Kit is integrated as plugin with Lightroom 4,5,6 and CC; Photoshop Elements 10-14 (App Store version is not supported due to Apple Sandboxing); Apple Aperture 3.2 or later; Adobe Photoshop CS5, CS6 or CC 2014, СС 2015, СС.
- Photos extensions support – for 10.11 only
Intensify CK Pricing
List price is $59.99 for the standalone application. (Look for a special limited time discount at the end of this review) You can also get it as part of the Creative Kit. There is a version of Intensify in the Mac App store, but it is a scaled down version and does not include the Plug-in support as mentioned above. To get the full features of Intensify CK you need to purchase it direct from Macphun.
Intensify CK feature set.
- Real-Time Image Processing Engine!
- Standalone software & Plug-in Support
- Native 16-bit RAW Processing
- Social integration: Facebook, Flickr, etc.
- 68 Professional Presets
- Advanced Structure and Micro Structure controls
- Layers & Masking
- Proprietary Technology for Revealing Details
- Vignette with Custom Center
- Proprietary Technology for Pro Contrast
- Powerful Macro Sharpness
- Built-in Macphun Print Lab
Now on to the review and my comments on Intensify CK
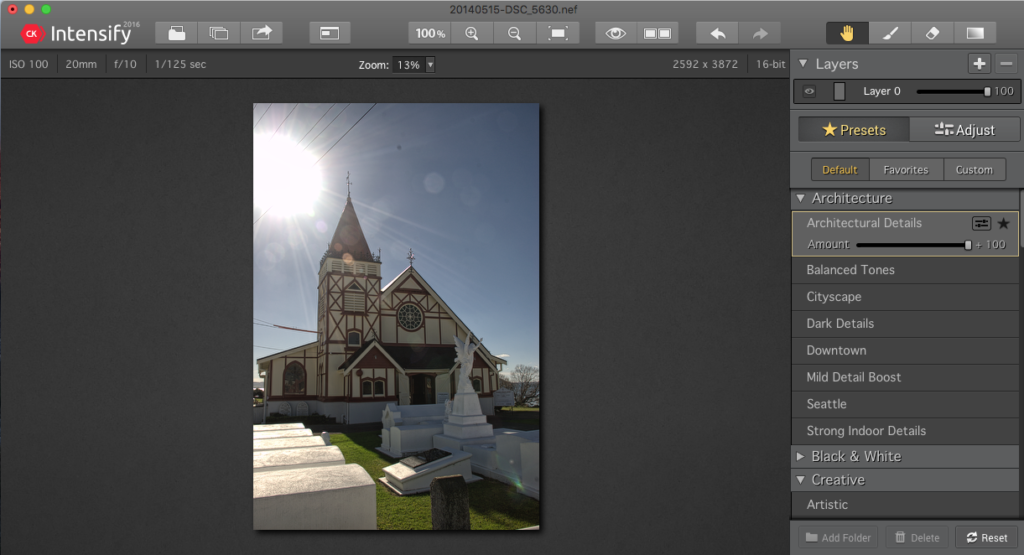
Intensify comes with a ton of Preset settings for a variety of different types of shots. For those just starting out, the presets are a good starting point. Try a the different preset on your photo by selecting the Preset button, then scroll through the list and click on a preset to see your photo instantly adjusted with the preset setting. By default the preset is applied at 100%, but if you think it is to intense, just slide the slider to the left to reduce the how much of this presets settings are applied to your photo.
This is Layer 0 with an Architectural Details Preset Applied at 100%
If you want to see what the preset did in detail you can use the Comparison tool ( icon that looks like 2 boxes next to each other) to see the original and the adjusted image side by side as show below.
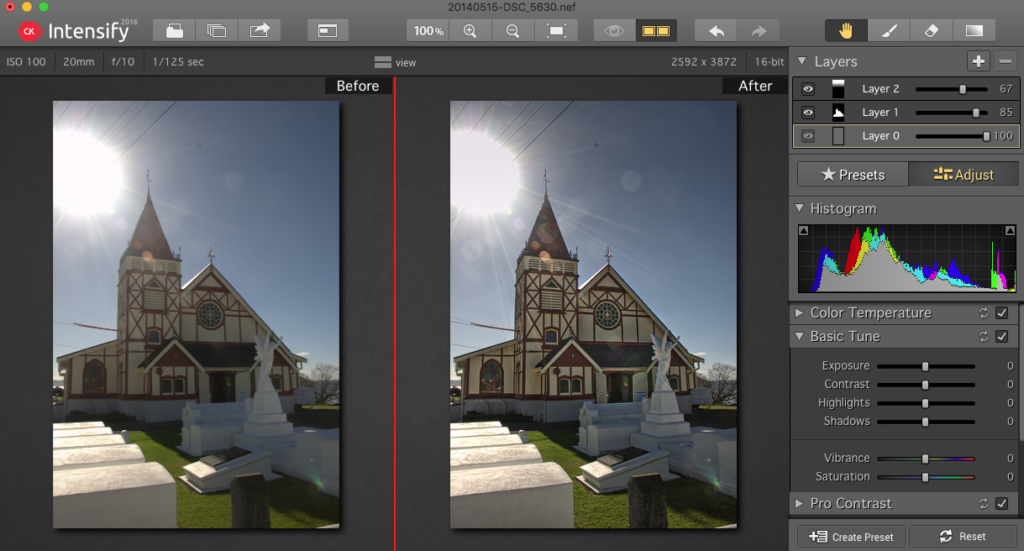
Here is a larger view of Original and Layer 0 Using the Preset. You can see how it brought out the details in the highlights and increased the contrast.
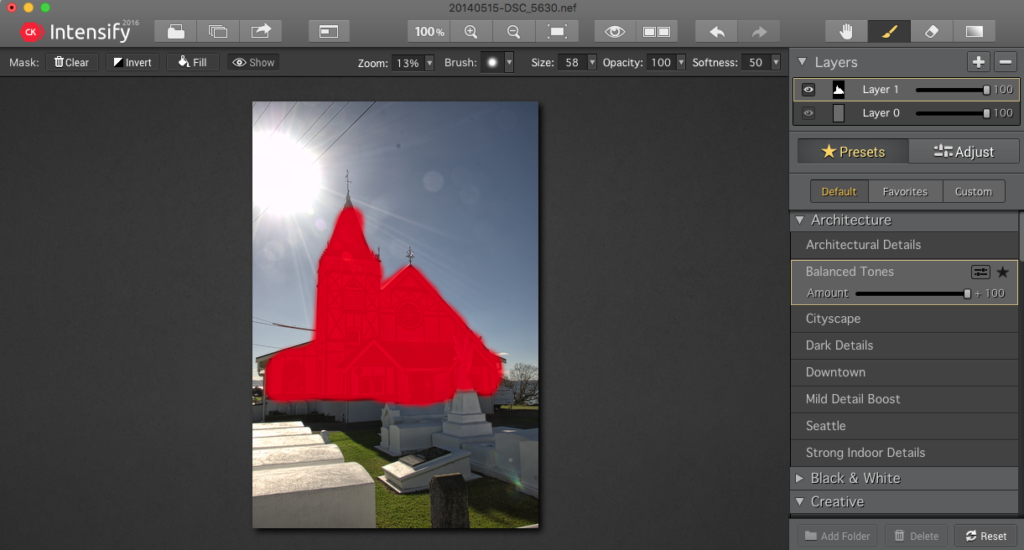
You don’t have to stop there. Intensify CK includes Layers. With Layers, you can add another layer on “top” of the existing adjustments to make more adjustments to either the entire photo or just a section of it. In my example below, I added a layer by clicking he + and selected the Balanced Tones preset. But I only wanted to apply it to the building, so I selected the paint brush that lets you brush in this adjustment. In the small window on the layer you can see where the brush has been applied. If you are not sure if you brushed over the entire area you wanted, you can turn on the show mask option.
Clicking “Show” will show the mask for the area you selected with either the Brush to brush in the adjustment over top off the previous layer adjustment or Erase to erase the previous layer setting. Below is what is shown when I selected the Show button.
Comparison of Layer 0 with Preset and Layer 1 Using the Preset on the masked area. Notice how the Church has been lightened up.
For this image I wanted to darken the sky in the top of the image as I though it was too bright. For this I added another layer and selected the Gradient tool. I placed the gradient on the image where I wanted to make the adjustment. You can expand the area that it covers by dragging the top or bottom line to make the are bigger or smaller. In this case I did not use a preset, but instead choose the Adjust button and made some changes in the Basic Tune adjustments.
Adding Layer 2 using “Gradient” and custom settings for that gradient
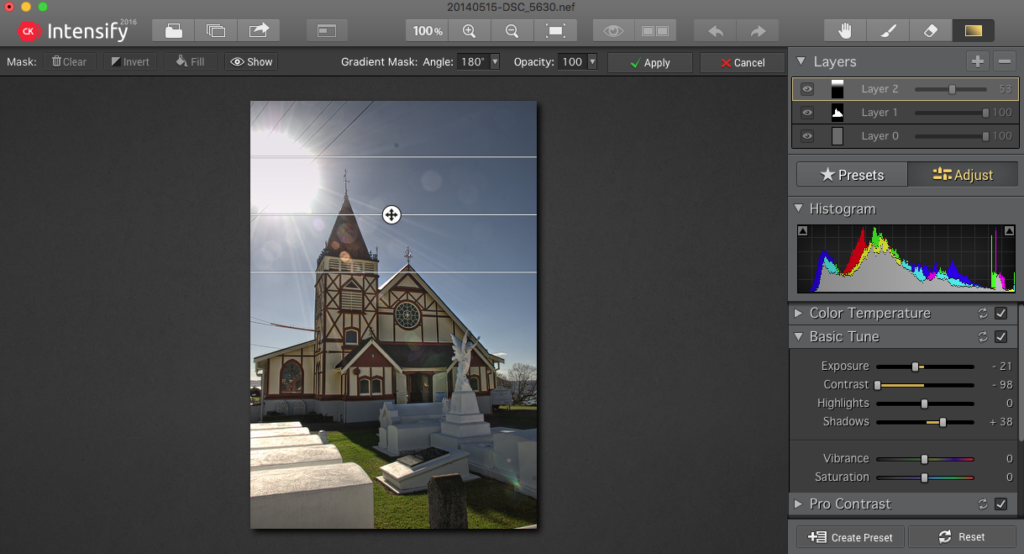
Comparison of Layer 0 with Preset, Layer 1 with masked Preset and Layer 2 Using the Gradient adjustment
The Plugin Architecture
Intensity CK has plugins available for Lightroom, Photoshop, Photoshop Elements, and Mac OS 10.11’s Photos.
You are prompted to install these during the install process, but if not, you can always install them later by going to the Intensify CK menu and choosing Install Plug-ins.
By installing these plugins to can use the features of Intensify CK from right inside your favorite application. As stated before, this is only for the version directly from Macphun and not the Mac App Store version of Intensify.
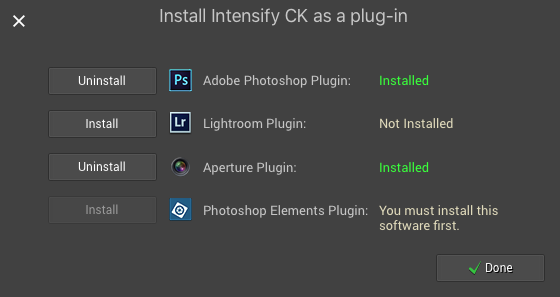
This is what the install dialog looks like. When you select Install Plug-ins, it will search your computer for the various applications that it supports and let you know if the plug-in has already been installed, wither you can install it, or let you know it didn’t find an application it supports. So for my screenshot you see I have it installed for Photoshop and Aperture, I haven’t yet installed it for Lightroom, and that I do not have Photoshop Elements.
In Summary
Intensify CK is a very easy to use program and is packed with all the options and adjustments you need to add that extra punch to your work. You can do everything with just using the presets and varying the intensity of the preset. Once you get familiar with the application you may rely less on the presents and use the Adjustment button and manually make the adjustment in the various sections shown. Or you can do a combination, start with a preset, then switch to the Adjustment mode and adjust just a few of the settings. The combinations are limitless.
Just a note, the image I’ve used in this demo is by no means complete as far as editing goes as I will be using some of the other apps that are part of the Creative kit. Such as Snapheal CK to remove the sensor dirt spots and maybe Noiseless CK to remove some of the noise in the dark areas.
A special for my followers and for making to the end of the review
I have been able to get you 50% off Macphun’s Intensify CK for a limited time. This offer expires July 14th, 2016
Visit the Intensify CK product page to check out all the details and buy Intensify CK. You can also download a trial copy to check things out before buying from that page. But remember, this is a limited time offer and ends in just a few weeks.
At checkout, Use Coupon Code
MARKDODD50
to get 50% off Intensify CK.
Please leave your comments below. Let me know if this review was of any help to you or just your thoughts in general. I’d love to hear from you.
#Review #Macphun #IntensifyCK #50percentoff #LimitedtimeDiscount


