Aurora HDR Next Release Announced

Aurora HDR 2017

Welcome to Aurora HDR 2017


Aurora HDR Next Release Announced today. Aurora HDR is the world’s most powerful HDR software made exclusively for Mac. If you are waiting for Aurora HDR for Windows  make sure to sign up and click the radio button for “I use PC” so you get notified of the Aurora HDR for Windows release at a future date.


Pre-orders for Aurora HDR 2017 will start September 14th, with the official release launch on September 29th for the Mac Version. Windows users, still sign up and get notified about Aurora HDR for Windows, it is coming, just not September 29th.


 Sign up Here to get notified when pre-ordering starts and any updates on the Aurora HDR 2017 release.


Summary of a few of the Aurora HDR 2017 Features and Improvements.

  • New Batch Processing
  • New Tools, including polarize filter and radial masking tool
  • New presets by Trey Ratcliff and other recognized pros
  • Updated tone-mapping and bracket merging technology for more realistic looking HDR images

This is just the shortlist. There will be over 20 key improvements and new features in this release.


Sign Up NOW to get notified of the additional features Aurora HDR 2017


Aurora HDR Next Release Announced Upgrades and Pricing

  • Current users of Aurora HDR Pro can upgrade to Aurora HDR 2017 at a special pre-order price of $49
  • Current users of the standard version of Aurora HDR can upgrade to Aurora HDR 2017 at a special pre-order upgrade price of $69
  • New customers can pre-order Aurora HDR 2017 for $89
  • Pre-order customers will also receive special bonuses that and announced soon. As soon as I”m notified of what they are I’ll post it here.


Sign up Here to get notified when pre-ordering starts and any updates on the Aurora HDR 2017 release.


#AuroraHDR #AuroraHDR2017 #AuroraHDRPro #AuroraHDRProUpgrade #AuroraHDRUpgrade #NewRelease #nextreleaseofAuroraHDR #Macphun #AuroraHDRWindows


Some Photography Slang

Photography slang that you may already know or should know.


I’m not much on acronyms or slang but I found the following article interesting and even a little amusing so I though I would share. Hope is either informative or gives you a smile at what some of them mean.


Click here to see the 10 slang words every photographer should know


Recently I’ve found myself having writers block or not able to think of a good subject to write about during the week. So I’ve decided that I will share some things that I’ve found that I think you might enjoy or benefit from. I’m far from an expert on everything related to photography, so if I find a site or article that I either benefited from or I think you could benefit from I’ll create a post and include a link to it.


Happy 4th of July

Happy 4th of July to Everyone.

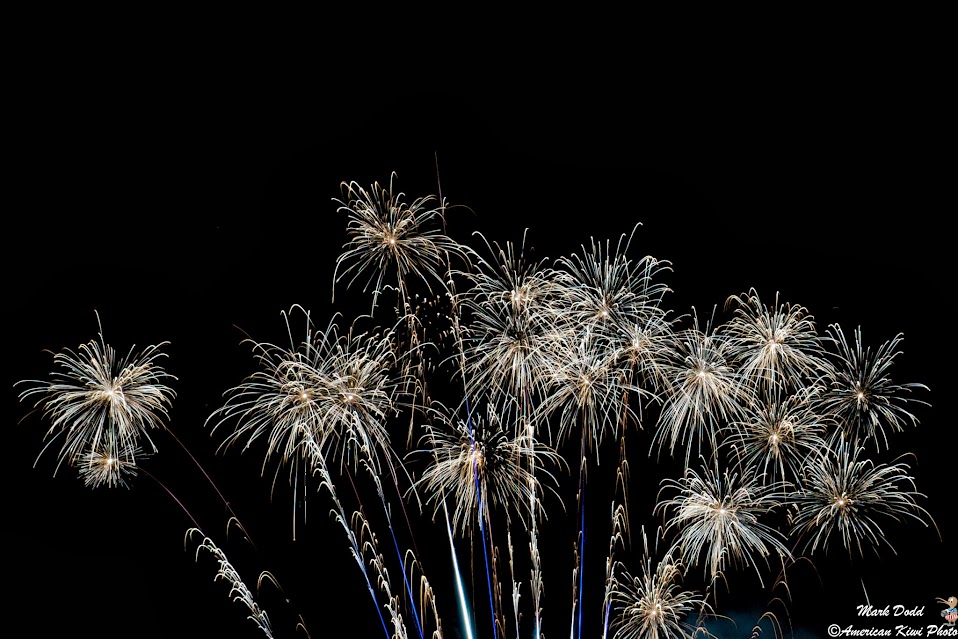
I hope you have a good day and get out there and get some great shots of the fireworks in your area.

And just a reminder, the

Macphuns' Shooting Fireworks Bundle

is still available to help you out with improving those fireworks shots that you will get or  just got.


Getting a website created and online in no time with Bluehost

So you are thinking of creating a website and not sure where to go and how long it will take, I have a quick and easy solution for you with Bluehost, my hosting provider.

These days I think everyone is in the website hosting business and there are many providers you can choose from, but I know Bluehost can can get your website up and online in no time.

Wither you are a techie and like to do everything yourself or someone who just wants to get online and not worry about the details, Bluehost has solutions for you.

So how do you get started…

Before you even go to Bluehost, I would recommend that you do a little pre planning.

Things to think about:

  1. Your domain name. Come up with a list of domain names that you might want to use. I would come up with at least 3 and order them in preferred order. There is always a chance that the name you want is already taken so you want to have your 2nd and 3rd choices ready to go.
  2. Think about the type of site you want to have. This is anything from a blog to a just a e-commerce store. Bluehost has options for any type of site that you want and I believe WordPress can accommodate most types, but if you need a specialized type of site, they have various options for those as well.
  3. Know you budget. Like every hosting site there are a ton of options from the low-end shared hosting to dedicated servers just for you site. You can always start at the shared hosting option and move up the options list to the dedicated server as needed. Also, you can get more for your money using the introductory pricing if you get multiple years of service up front. This is what I did and it has saved me a lot over my initial sign-up period
  4. Think about your content. This mainly comes in for the Basic and Plus shared hosting options as there is a limit on server space. If you site is going to be heavy on images or videos that are stored on your site you may have to go with the Pro shared site option to start as it has unmetered storage space

Knowing these things will help you deciding which of the multitude of services that Bluehost can offer that you will need to start with.

Now that you have done your pre-planned. Lets go through the steps of getting you online and up in running.

Continue reading “Getting a website created and online in no time with Bluehost”

Get Adobe Lightroom and Photoshop CC

Adobe has a special Creative Cloud set just for photographers for just $9.99/month

So to get Adobe Lightroom and Photoshop CC click on the image below.


Adobe_PSLR_Affiliate_Bnnr_728x90_r1


They do offer Educational pricing on the full Creative Cloud set of applications, but for Photography Creative Cloud the pricing is the same for everyone. If you are interested in the full Creative Cloud set of applications, click the image above, then click on the Student and Teachers tab to see how to get All the Apps at Educational pricing.

The Creative Cloud subscriptions include all application updates as long as your subscription is active.

#lightroom #photoshop #PhotographyCC #Adobe #CreativeCloud


Review of Becoming An Artist Season 1

Becoming An Artist Season 1 with Trey Ratcliff of StuckinCustoms.com

Preface

First I must say I do my best to be unbiased in all my reviews, but in this case I must disclose that I’ve been following Trey Ratcliff for years and as such I”m am a big fan so this review might be a little unintentionally biased. I’ve followed him for so long that I seen changes in his website, changes in his photography equipment, and the ever evolving changes and improvements in his photography. I’ve seen him go from a one person show to a multi artist show, to a worldwide show, and now to Facebook live. I’ve seen his business constantly expanding with new and exciting products and adventures. I also had the pleasure of meeting him in person on a photo walk he and the Stuck in Customs crew did last year in Philadelphia and Washington DC. If you want to see what that was like visit tour.treyratcliff.com

That said, let’s get to the review.

Becoming an Artist Series 1 is comprised of 15 episodes. Each episode is about 30 mins long and divided into two sections. In the first section of each episode you hear Trey tell personal stories such as a bit of his life history, how he became a photographer in his 30’s, and some of the things that inspire him in his photography and art. I believe he does this to give you a sense of where he’s coming from, how he sees the world, and what affects this has on his photography. There is some dialog just about art in general and how other art can help influence or inspire your photography. He will discuss the picture(s) he is taking at that time, why he choose to take that picture, and some tips about the picture including composition, color, light, and inspiration.

In the second section of each episode you get transported to Trey’s Studio in Queenstown New Zealand, where he will show you his editing techniques on some of the photos he took during the previous section using various tools from PhotoMatix, Lightroom,  Photoshop, and other tools like Autopano Giga for his panorama’s. He shows you basic techniques up to some very advanced techniques.

Episodes have interesting titles like

  • Episode 1 – The Accidental Creation of Me
  • Episode 6 – Writing a Failed Novel
  • Episode 10 – A Reccy to Chernobyl
  • Episode 14 – A Street Fight in Morocco

So you can see this is not your typical tutorial series.

This series was created before Aurora HDR came out, so for this season he doesn’t use his new tool, Aurora HDR Pro, which he co-developed with Macphun software.

In addition to the video series Trey has created a Facebook group “Becoming and Artist – Trey Ratcliff’s Funky Lounge” where you can post your own work and interact with fellow artists.

Continue reading “Review of Becoming An Artist Season 1”

For my Aurora HDR fans, New Presets for Aurora HDR Pro from Trey

For my Aurora HDR fans, the co-creator of Aurora HDR, Trey Ratcliff, has just release a new addition to the program.

Trey’s Expansion Preset Pack for Aurora HDR 2017

The expansion pack includes 25 Presets, 2 Tutorial Videos, and 20 Sample Images that you can use to practice with Aurora HDR 2017 and his new presets.

You can get this expansion pack from

The Expansion Pack at the Stuck in Customs Store

Dont’ forget you can get 10% off of most products at the Stuck in Customs store using the Coupon Code: MDP10. Since this product was just released I’m not sure if the code works yet for this product, but it is good for many of the other items in the Stuck in Customs store. Best advise is to pick what you would like, add it to your cart, and enter the Coupon Code: MDP10 and the site will let you know.


Here is his quick tutorial/intro to the Expansion pack.


If the video doesn’t load for some reason, click The Expansion Pack at the Stuck in Customs Store and the video is in the Product Description.

The expansion pack is only available from Stuck in Customs.

#AuroraHDR2017 #AuroraHDR2017ExpansionPack #Aurora2017ExpansionPack #StuckinCustoms #Addons #Presets


Maryland Preakness Hot Air Balloon Festival

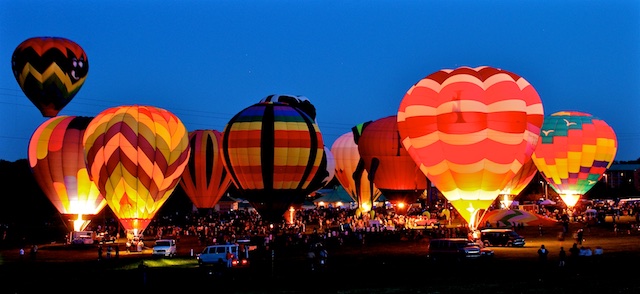
A recent purchase of a 30.000″ x 13.750″ print of Balloon Glow by a buyer from Baltimore, MD reminded me that the Maryland Preakness Hot Air Balloon Festival is just around the corner.

First, I want to thank them for their purchase and I’m always grateful to anyone for purchasing my work.

The above picture is the one they selected. A wide shot of the Balloon Glow that they hold on 2 nights of the festival.

If you have never been to the Preakness Hot Air Balloon Festival I would recommend going. It is a fun event and is family-friendly. You can get Balloon rides and walk inside one of the balloons.  If you can only go one day, I would go on one of the days that they do the Balloon Glow, pictured above. It is rather amazing to see all the Balloons lit up. Be aware that when they are all firing their flames to illuminate their balloon it is rather loud

Here is a small selection of photographs I’ve taken at this festival in earlier years.

For details about the event, Visit The Preakness® Celebration Hot Air Balloon Festival Page

#preakness #Balloon #festival #hotairballoon


ON1’s New RAW software

ON1 is announcing ON1 Photo RAW  – Coming Fall 2016

960x333


ON1 Announces ON1 Photo RAW the Future of RAW Photo Editing and includes support for over 800 cameras. Described as the first all-new RAW processor and non-destructive photo editor to be release in years.

There will be two ways you can get this new and exciting program.

The first method is to sign up for their On Plus Pro program now. You will get the current version of ON1 Photo 10.5 today and will be the first to get ON1 Photo Raw when released in the fall.

The second is to sign up to get notified when pre-orders begin being accepted for upgrade or new purchase.

Since this product is still in the works it is best to check out their ON1 Photo Raw Announcement Page for the latest information.

#ON1PhotoRAW  #ON1 #RAW #RAWeditor #nosoftwaresubscription #discount


Facebook Live – Now for everyone

You too can use Facebook Live

If you follow my Facebook page, hopefully you have viewed and subscribed to one of my live feeds on Facebook when I’m out and photographing and am able to do a live feed.

For awhile, Facebook had limited who could to do this to a small group of users via Facebook Mentions app and then released it to more users on in the Facebook app on iOS devices.

But now, Facebook Live is available to everyone on both iOS and Android devices. Currently only works on the mobile device app and not on the web browser version of Facebook.

When you go to create a post there will be a new icon at the bottom of your post. See the below picture to see what it looks like and where it is on the screen.


IMG_4218


If you do not see this icon, chances are you need to update your Facebook app on your mobile device. Once you get the latest version of Facebook installed, this icon should appear.

If you have a Facebook Page or an Event Page, you can do live video there as well.

On the Facebook Page, when you click Publish you should see the icon at the bottom of the Publish Post just like above.


Now when you click the Facebook Live icon….

Your live video screen will open and prompt you to enter a short description of what your video is about. This description will show in the Facebook feed just above the video.

If this is your personal Facebook page, you can limit who will see the live video. To do this click on the “Public” icon and select one of the friends lists you have created to have the live feed just showing to those users. For Facebook Page published posts, it is “Public” only. I haven’t tested an Event page live feed yet, but I’m assuming it is limited to users associated with the event. Note: if you have selected a friends list, the next time you open the app it that friends list is still selected. So just remember that you may need to change who you are broadcasting to the next time you open the Facebook live feature.

IMG_4254

Your all set, go ahead and click “Go Live”. You will be given a 3 second countdown and then you are live.

IMG_4249


When you are live you will see the below. A few things to know when you are live. By default the app will use your rear camera (the one facing away from you), but you can switch for the forward facing camera by clicking the icon in the top right. Click it again to go back to the rear camera. Below your live video (which is black on the image below as I had my phone on my desk so the camera wasn’t showing anything) you will see who has joined your live feed and any comments or Facebook Reactions they have posted to your live feed.

Facebook has plans to add other features to the live feed screen. On my iOS Facebook app it seems that the filter feature is available now. Try it out to see if you have it by swiping left or right on the video section of the screen. The filters that are showing up for me are; Pop, Classical, Country, Funk, Acid, and the default of No Filter. Each gives your video a different look so give it a try to see if it is working on your Facebook Live feed and to see what each does.


IMG_4250


When you are ready to end your Facebook Live feed, click the finish button. After you click finish, you will see the “Ending Live Video” screen where you have a few seconds to cancel the “Ending Live Video” if you clicked it by mistake. (One other note, if you accidentally switch to another app or your devices home screen while doing a live feed, as long as you didn’t close the Facebook app, you can go right back to it as it would have automatically been paused. Just click the pause button to go back to being live)


IMG_4251


At the end of the live feed depending upon wither this was a personal Facebook page or a Facebook Page live feed you will see screens shown below that give you details about your live feed. For the Facebook Page live feed you will get stat information about live video.  Also at the bottom there is the option to save the live feed video to your device by activating the slider. It is off by default, but in my example images I have turned it on.


IMG_4247
Personal Page

IMG_4252
Mark Dodd Photography Page


After clicking “Done” you will see your Facebook page and the live feed posting in your Facebook feed as shown below. This is also the same view folks will see in their Facebook feed when you are live. They just click the Play button to view it live when you are live or for playback when you have finished your live feed.


Screen Shot 2016-04-16 at 10.52.24 AM


Your followers can subscribe to your live feeds. I can’t say for Android devices, but when I’ve watch other users live feeds on my iOS and Mac, the subscribe button shows up at the end of the live feed that I’m watching. So at the end of your live feed remind your users to click the subscribe button so they can get notified when you do your next live feed.

Now go out there and have fun with this new feature of Facebook that is now available to everyone.

If you want to test things out before going live to your friends or the world there is a way. When you have clicked on the live feed and are on the screen to enter your description and the group you are broadcasting to, click “Public” and select “Only Me”. When you select “Only Me” the Facebook Live post will only show up in your Facebook feed. Once you have completed testing you might want to go to your Facebook Page and delete the testing live video post.

#facebooklive #livefeed #livevideo #facebook #broadcast #nowforeveryone