First I must say I do my best to be unbiased in all my reviews, but in this case I must disclose that I’ve been following Trey Ratcliff for years and as such I”m am a big fan so this review might be a little unintentionally biased. I’ve followed him for so long that I seen changes in his website, changes in his photography equipment, and the ever evolving changes and improvements in his photography. I’ve seen him go from a one person show to a multi artist show, to a worldwide show, and now to Facebook live. I’ve seen his business constantly expanding with new and exciting products and adventures. I also had the pleasure of meeting him in person on a photo walk he and the Stuck in Customs crew did last year in Philadelphia and Washington DC. If you want to see what that was like visit tour.treyratcliff.com
That said, let’s get to the review.
Becoming an Artist Series 1 is comprised of 15 episodes. Each episode is about 30 mins long and divided into two sections. In the first section of each episode you hear Trey tell personal stories such as a bit of his life history, how he became a photographer in his 30’s, and some of the things that inspire him in his photography and art. I believe he does this to give you a sense of where he’s coming from, how he sees the world, and what affects this has on his photography. There is some dialog just about art in general and how other art can help influence or inspire your photography. He will discuss the picture(s) he is taking at that time, why he choose to take that picture, and some tips about the picture including composition, color, light, and inspiration.
In the second section of each episode you get transported to Trey’s Studio in Queenstown New Zealand, where he will show you his editing techniques on some of the photos he took during the previous section using various tools from PhotoMatix, Lightroom, Photoshop, and other tools like Autopano Giga for his panorama’s. He shows you basic techniques up to some very advanced techniques.
Episodes have interesting titles like
Episode 1 – The Accidental Creation of Me
Episode 6 – Writing a Failed Novel
Episode 10 – A Reccy to Chernobyl
Episode 14 – A Street Fight in Morocco
So you can see this is not your typical tutorial series.
This series was created before Aurora HDR came out, so for this season he doesn’t use his new tool, Aurora HDR Pro, which he co-developed with Macphun software.
Dont’ forget you can get 10% off of most products at the Stuck in Customs store using the Coupon Code: MDP10. Since this product was just released I’m not sure if the code works yet for this product, but it is good for many of the other items in the Stuck in Customs store. Best advise is to pick what you would like, add it to your cart, and enter the Coupon Code: MDP10 and the site will let you know.
Here is his quick tutorial/intro to the Expansion pack.
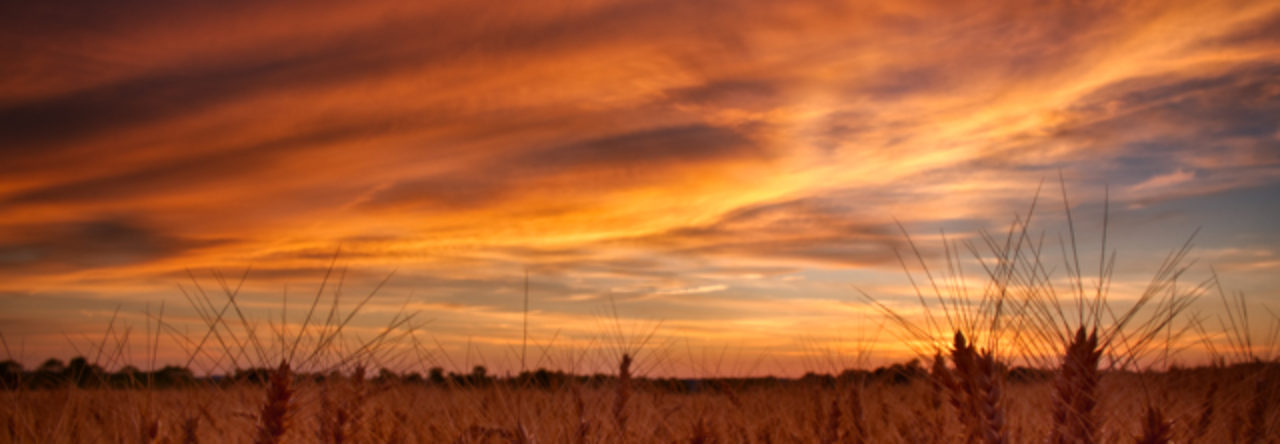
A recent purchase of a 30.000″ x 13.750″ print of Balloon Glow by a buyer from Baltimore, MD reminded me that the Maryland Preakness Hot Air Balloon Festival is just around the corner.
First, I want to thank them for their purchase and I’m always grateful to anyone for purchasing my work.
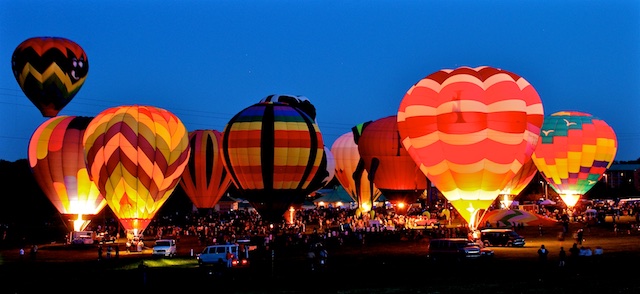
The above picture is the one they selected. A wide shot of the Balloon Glow that they hold on 2 nights of the festival.
If you have never been to the Preakness Hot Air Balloon Festival I would recommend going. It is a fun event and is family-friendly. You can get Balloon rides and walk inside one of the balloons. If you can only go one day, I would go on one of the days that they do the Balloon Glow, pictured above. It is rather amazing to see all the Balloons lit up. Be aware that when they are all firing their flames to illuminate their balloon it is rather loud
Here is a small selection of photographs I’ve taken at this festival in earlier years.
ON1 is announcing ON1 Photo RAW – Coming Fall 2016
ON1 Announces ON1 Photo RAW the Future of RAW Photo Editing and includes support for over 800 cameras. Described as the first all-new RAW processor and non-destructive photo editor to be release in years.
There will be two ways you can get this new and exciting program.
The first method is to sign up for their On Plus Pro program now. You will get the current version of ON1 Photo 10.5 today and will be the first to get ON1 Photo Raw when released in the fall.
The second is to sign up to get notified when pre-orders begin being accepted for upgrade or new purchase.
Since this product is still in the works it is best to check out their ON1 Photo Raw Announcement Page for the latest information.
If you follow my Facebook page, hopefully you have viewed and subscribed to one of my live feeds on Facebook when I’m out and photographing and am able to do a live feed.
For awhile, Facebook had limited who could to do this to a small group of users via Facebook Mentions app and then released it to more users on in the Facebook app on iOS devices.
But now, Facebook Live is available to everyone on both iOS and Android devices. Currently only works on the mobile device app and not on the web browser version of Facebook.
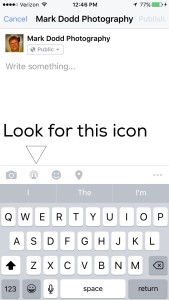
When you go to create a post there will be a new icon at the bottom of your post. See the below picture to see what it looks like and where it is on the screen.
If you do not see this icon, chances are you need to update your Facebook app on your mobile device. Once you get the latest version of Facebook installed, this icon should appear.
If you have a Facebook Page or an Event Page, you can do live video there as well.
On the Facebook Page, when you click Publish you should see the icon at the bottom of the Publish Post just like above.
Now when you click the Facebook Live icon….
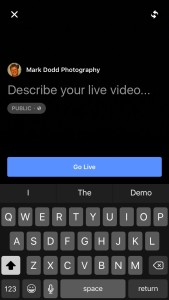
Your live video screen will open and prompt you to enter a short description of what your video is about. This description will show in the Facebook feed just above the video.
If this is your personal Facebook page, you can limit who will see the live video. To do this click on the “Public” icon and select one of the friends lists you have created to have the live feed just showing to those users. For Facebook Page published posts, it is “Public” only. I haven’t tested an Event page live feed yet, but I’m assuming it is limited to users associated with the event. Note: if you have selected a friends list, the next time you open the app it that friends list is still selected. So just remember that you may need to change who you are broadcasting to the next time you open the Facebook live feature.
Your all set, go ahead and click “Go Live”. You will be given a 3 second countdown and then you are live.
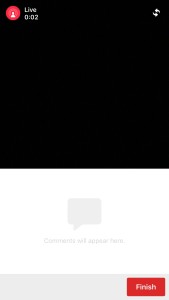
When you are live you will see the below. A few things to know when you are live. By default the app will use your rear camera (the one facing away from you), but you can switch for the forward facing camera by clicking the icon in the top right. Click it again to go back to the rear camera. Below your live video (which is black on the image below as I had my phone on my desk so the camera wasn’t showing anything) you will see who has joined your live feed and any comments or Facebook Reactions they have posted to your live feed.
Facebook has plans to add other features to the live feed screen. On my iOS Facebook app it seems that the filter feature is available now. Try it out to see if you have it by swiping left or right on the video section of the screen. The filters that are showing up for me are; Pop, Classical, Country, Funk, Acid, and the default of No Filter. Each gives your video a different look so give it a try to see if it is working on your Facebook Live feed and to see what each does.
When you are ready to end your Facebook Live feed, click the finish button. After you click finish, you will see the “Ending Live Video” screen where you have a few seconds to cancel the “Ending Live Video” if you clicked it by mistake. (One other note, if you accidentally switch to another app or your devices home screen while doing a live feed, as long as you didn’t close the Facebook app, you can go right back to it as it would have automatically been paused. Just click the pause button to go back to being live)
At the end of the live feed depending upon wither this was a personal Facebook page or a Facebook Page live feed you will see screens shown below that give you details about your live feed. For the Facebook Page live feed you will get stat information about live video. Also at the bottom there is the option to save the live feed video to your device by activating the slider. It is off by default, but in my example images I have turned it on.
Personal Page
Mark Dodd Photography Page
After clicking “Done” you will see your Facebook page and the live feed posting in your Facebook feed as shown below. This is also the same view folks will see in their Facebook feed when you are live. They just click the Play button to view it live when you are live or for playback when you have finished your live feed.
Your followers can subscribe to your live feeds. I can’t say for Android devices, but when I’ve watch other users live feeds on my iOS and Mac, the subscribe button shows up at the end of the live feed that I’m watching. So at the end of your live feed remind your users to click the subscribe button so they can get notified when you do your next live feed.
Now go out there and have fun with this new feature of Facebook that is now available to everyone.
If you want to test things out before going live to your friends or the world there is a way. When you have clicked on the live feed and are on the screen to enter your description and the group you are broadcasting to, click “Public” and select “Only Me”. When you select “Only Me” the Facebook Live post will only show up in your Facebook feed. Once you have completed testing you might want to go to your Facebook Page and delete the testing live video post.
Google announced on March 24th that the Nik Collection of photo editing software is now Free to everyone.
A few years ago,Google purchased Nik Software
Nik software has been highly recommended by many a photographer to me, but that was around the time Google purchased Nik Software so I didn’t buy it as I was waiting to see what Google would do with it.
I have not used the software yet myself so for now I cannot give you my opinion of it, but go ahead and download it and see if it works for you. There is no manual per say, but they do have an extensive help center along with Tutorials under each program tab on the download page.
It supports both Mac and Windows. Review the system requirements at the bottom of the download page to make sure it is compatible with your OS version and hardware before downloading.
Here is a link to the announcement Google made on March 24th.
Went down for the last night of the Light City Festival at the Inner Harbor yesterday to redo some shots that I was not happy with and to get a few art pieces that I had missed somehow.
Although I did like the picture I got of the “Voyage” (the floating lights), I felt getting a few more shots when it was darker of just the lights would be better. I also went back to the Peacock to get some more shots when it was darker and was hoping with less people. Alas, it was as popular as before, but I think I got a few good shots in between all the folks walking up to the work who were there to admire it as well. I will say the “Voyage” and the “Peacock” were my two favorite pieces of the show. The Laser Lotus may have been another one, but the two days I was in the area it didn’t seem to be working.
I had gone back down to also get the “The Pool” as I had somehow missed that exhibit entirely last time even though I would have had to walk right passed them to get to the metro on my way home the other night. I guess I was just too tired to notice at that point.
Here are a few unedited shots I got of each. I took a ton of photos of each as I knew it was the last chance to get them. It is going to make it tough to narrow it down to the best of each.
The Peacock
The Peacock a 20 foot tall animatronics bird with illuminated wings up to 40 feet
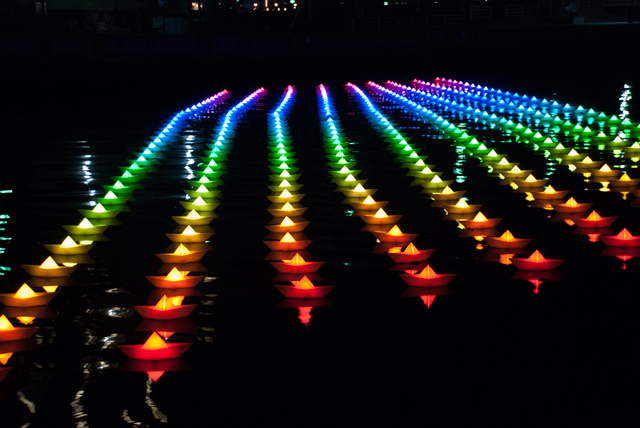
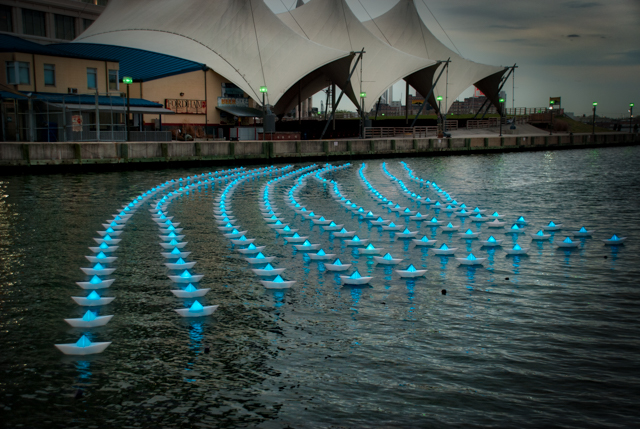
The Voyage
Voyage presented by Brown Advisory: Aether & Hemera (United Kingdom) 300 “paper boats” with rainbow-colored lights that were manipulated by festival-goers.
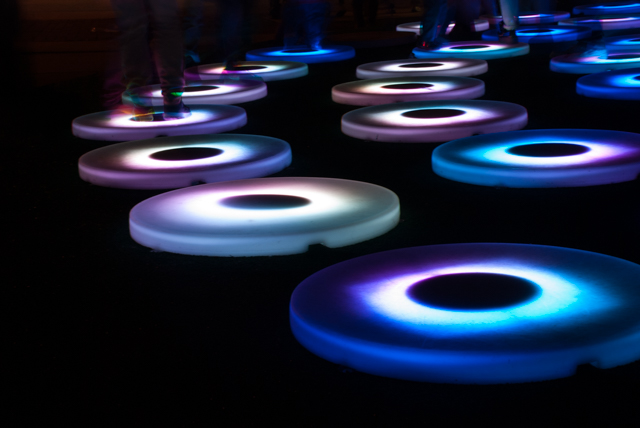
The Pool
Colorful concentric circles that changed colors as folks stepped on them
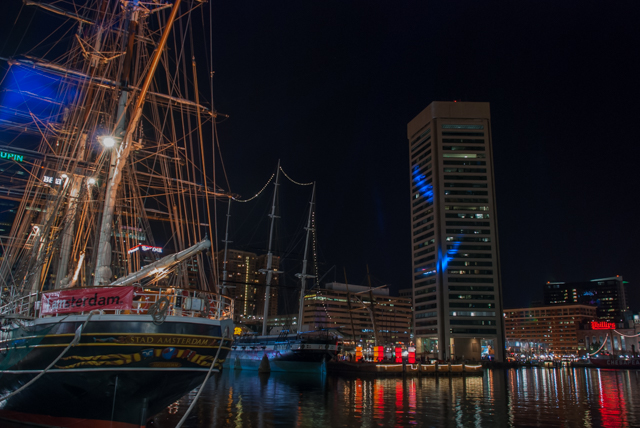
Spent another night at the Inner Harbor for the Light City Festival last night.
This time I started over at Inner Harbor East and walked back towards the Inner Harbor. This was the side that had more of the individual artists displays. Out of the two halves that I saw this is definitely the more interesting side.
I did miss getting the tall ship Stad Amsterdam as it had left the Inner Harbor and was a bit disappointed about that. That just stresses the point of, if you see something you want to take a picture of take it as it might not be there tomorrow. As in my case, I got the stern of the ship and meant to get it from the bow last night, but it had left.
The show goes on until Sunday night (4/3/16) and it is worth the visit. If you are limited on time I would start on the East side and make your way back towards the Inner Harbor.
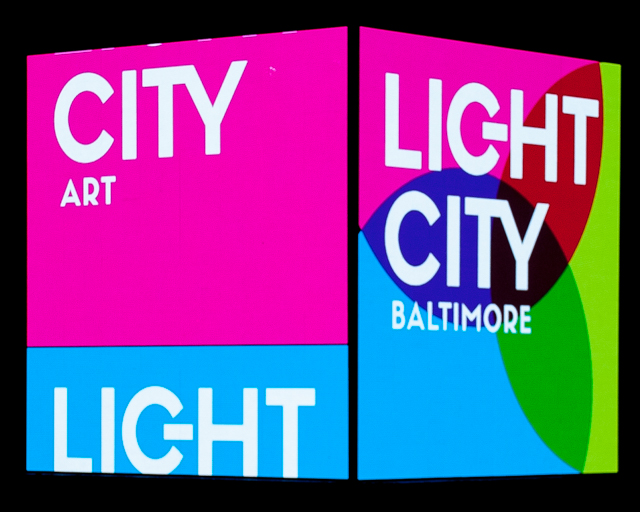
The Big Cube
The Beacon: The Barnycz Group (Baltimore, MD) A landmark multi-story cube built from hundreds of LED panels. The Beacon will engage, inform, and entertain festival-goers with Light City images.
The Floating Lights
Voyage presented by Brown Advisory: Aether & Hemera (United Kingdom) 300 “paper boats” with rainbow-colored lights that are manipulated by festival-goers.
Spent the good part of Tuesday night in downtown Baltimore at the Light City Baltimore event. This is just one day of many I plan on being down there for this event. Most of the displays are around the Inner Harbor in Baltimore, but some are also spread around the city. See the Light City Baltimore website at lightcity.org/ for details of what is where.
This first night I started out on Federal Hill to get the wide view of downtown and then slowly made my way up towards the Light St Pavilion. This is not even 1/2 way around the event. I took my time and in many situations, as I had to be very patient to get the shot I wanted. I will say I didn’t see as many photographers as I expected, but then again I haven’t seen all the displays yet and some of the more interesting displays are in areas I will go to on Thursday.
I’ve got many pictures to go through and process, but here is just a sampling of first the two I’ve processed quickly for you.
The Ferris Wheel
The Ferris when by Rash Field and the Maryland Science Center. My first attempt at doing this kind of photo. I think it turned out pretty well.
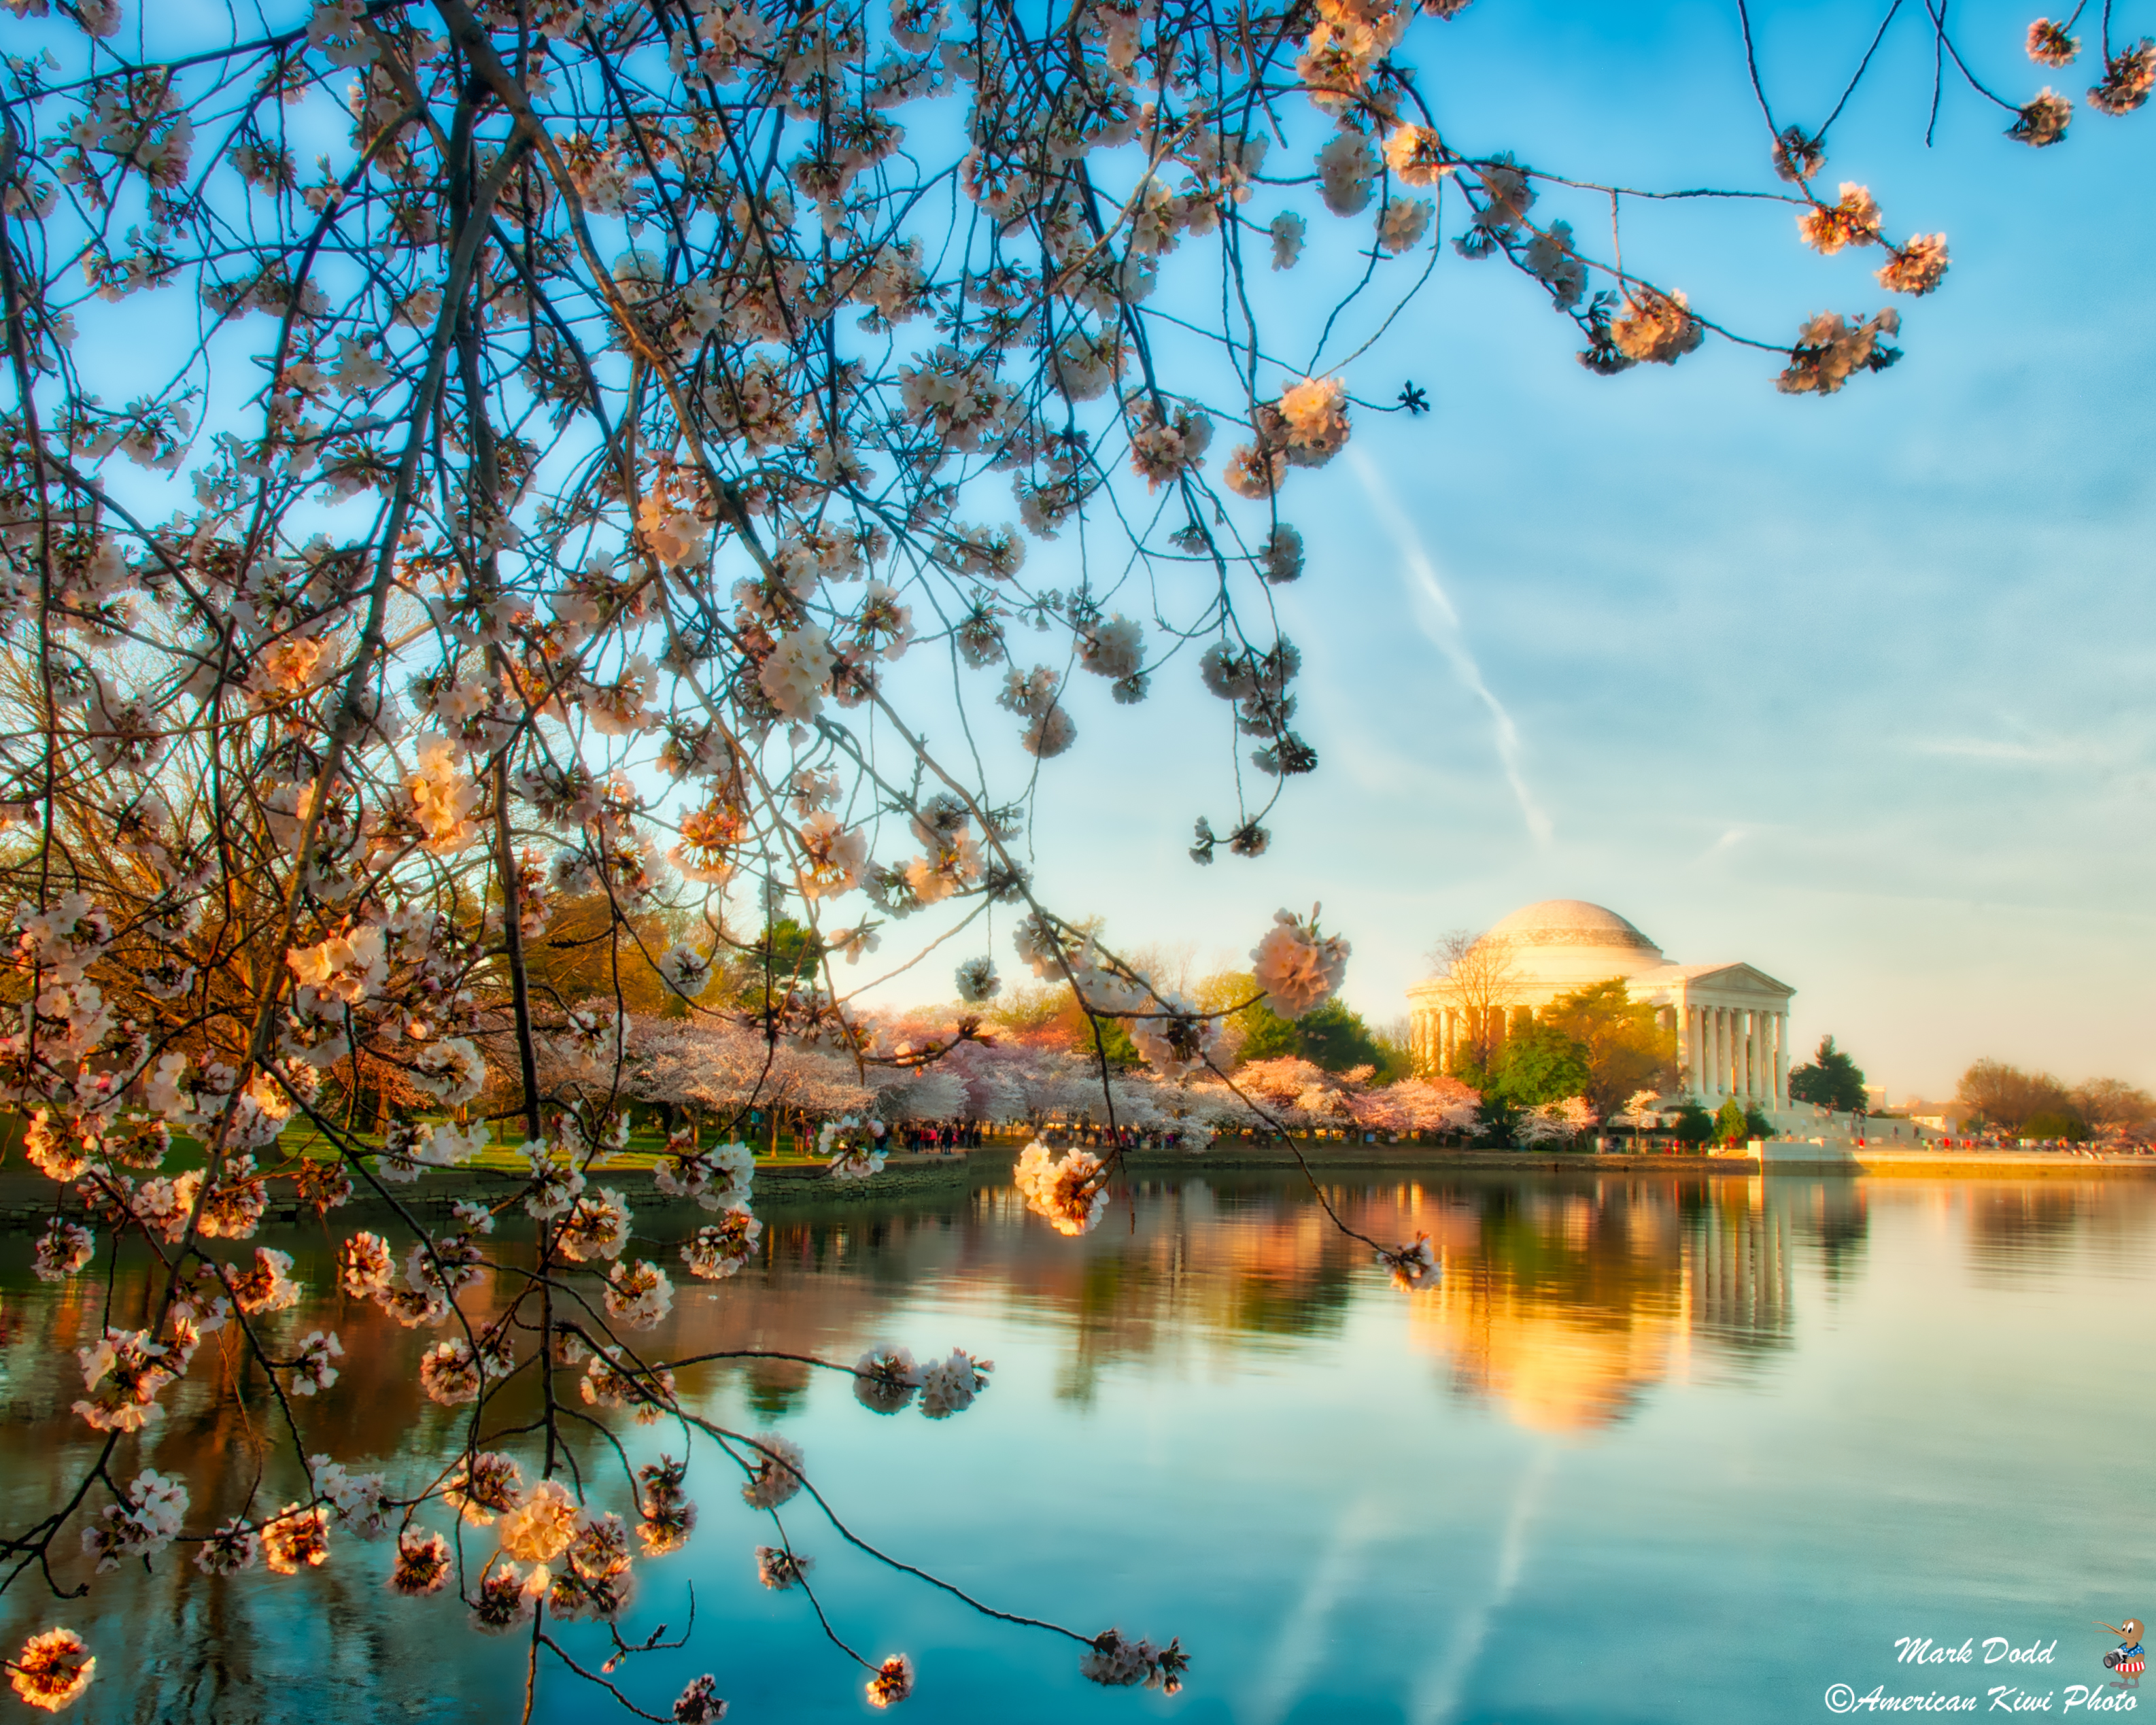
I had a pretty productive day shooting the Cherry Blossoms around the Tidal Basin in Washington DC. Spend pretty much the entire morning down there and walked the entire basin.
It is taking a bit longer to edit the photos as after coming home I discovered I must have dirt on my sensor or somewhere in the camera. So it is taking me a bit longer to edit them as I have to clean the dirt spots of each picture. Although there is software out there that can remove the spots it is always best to make sure your camera is clean before your trip. In my case I did check out the sensor and cleaned the lens before this trip, but either the dust is very small on the sensor or I had dirt on my ND filter. I’m going to re clean everything and see if I can figure it out and do some test shots to see if I got it clean.
Washington Monument and the Cherry Trees
The Cherry Trees along the Tidal Pool with the Washington Monument in the background.
One of the first shots I got during the day and turned out as one of the better shots I got during the day. It is from the bridge on the way to the Jefferson Memorial.